 Moving to a new place is certainly exciting, but it can also be stressful — and expensive. Once you factor in things like movers, packing materials, truck rentals, gas and more, the costs can creep into the hundreds, maybe even thousands of dollars, for just a single move.
Are you planning a move soon? Don't want to break the bank in the process? Fortunately, a little forethought and creativity can help in that department. Here are five ways to help reduce your costs and keep a tight rein on your moving budget: 1. Shop Around for a Moving Company Moving companies typically charge hundreds of dollars for their services, plus extra for things like gas, mileage and larger items like pianos and furniture. If you're going to hire a professional mover, shop around first. Get quotes from at least three different moving companies, and double-check the line-item charges. Does the quote include the truck, all protective materials, gas, mileage and larger furniture items? Does it provide insurance coverage in case of damage to any items you’ll be moving? If not, learn what adding these will cost you if they become necessary. You can also consider local “mom and pop” moving teams or using an online service that matches freelance labor with local demand to help with everyday tasks. These come at a cost, of course, but are typically more affordable than a large moving company that has less flexible pricing. Another great way to reduce your cost is to schedule your move for the winter or fall, if that is an option for you, as that’s when demand for professional movers is typically low. Weekdays are also a good choice, as most people move on the weekends. A moving company may be willing to give you a better deal if you move during these low-demand times, as they may be less busy and looking to fill their schedule. It may be worth exploring these options. Pro tip: Consider doing a little research by checking out organizations online that provide consumer reviews of businesses. Before booking your movers, look at their reviews to get a sense of a company’s track record with other customers and try to verify that the company is legitimate. Note that none of these websites is a guarantee of a perfect experience, but they may help you with your decision. 2. Consider a DIY Move Depending on how much you have to move and how heavy or cumbersome the items are, you may want to consider forgoing professional movers altogether if it looks as if your belongings can be managed without hiring help. If you have dependable family and friends that are willing and able to help with the packing, loading and transport, you might consider offering pizza or a free meal as a token of your appreciation in exchange for their help. If you have larger items, consider renting a small rental truck for a few hours. Get the smallest size possible and be sure to fill up the fuel tank before you return the vehicle. (It may cost you more if you leave the rental truck in need of gas that the moving company must take care of itself. Pro tip: Plan so that you're not moving during rush hour. Heavy stop-and-go traffic can drive up your fuel costs as well as delay your move. 3. Only Move What You Need It's important to pare down your belongings before a move. That means donating, selling or throwing away any items you no longer use, need or plan to use in the future. For one, this reduces your load and, subsequently, your costs to move it. Additionally, if you’re motivated to sell some of your unwanted items, you can put those extra funds toward your moving costs — or use it toward the cost of furniture or decor for your new place. Here are some options for downsizing your household before you move:
Offloading some belongings will also make unpacking easier (not to mention faster). Pro tip: Measure your furniture and make sure it will fit in your new home, as well as through necessary access points. If it won't fit, sell it and consider using the funds for replacement furniture once you're in your new place. 4. Get Creative with Your Packing Buying boxes, bubble wrap, tape and packing peanuts can get expensive. Instead of purchasing these items, take a more creative approach and use things you already have. Sheets, towels, blankets and cloth napkins all work great as packing materials, and they all need to be packed up anyway, so why not use them? You can also use your own duffel bags, luggage, purses and backpacks rather than cardboard boxes. Once you run out of these items, try one of these resources for free or low-cost boxes:
Pro tip: Start saving the plastic and paper bags from your shopping trips. These make good packing materials and can even be used to help protect fragile items. 5. Track and Deduct Your Expenses If you're a member of the military (or someone in your household is) you may be able to deduct your moving expenses1 on your annual tax returns. To qualify, you'll need to be moving due to a permanent change of station. If you're eligible, you'll be able to deduct the costs of moving, storage, travel, lodging and other expenses you incur due to the move. Pro tip: Keep a detailed record of your moving costs if you qualify for this deduction. Save all your receipts and invoices and keep them somewhere safe until tax season rolls around. Don't Forget Are you moving to a new place? Don't forget to update your homeowners insurance policy. Use your move as an opportunity to ensure all your belongings, valuables and new property are protected. Contact your insurance agent to learn more about home insurance coverage and how it can safeguard your new home and family.
0 Comments
 Did you ever leave for work without turning down the heat on a blustery winter day? Or head out for a day trip in the middle of summer without dialing down the air conditioning for your dog? A smart thermostat can help you heat and cool your home more efficiently, monitor your energy consumption and let you control your home’s heating and AC systems from your smartphone, wherever you may be. These devices can help protect your home from damage caused by frozen pipes by alerting you if your home is getting dangerously cold. But there are also some important safety considerations.
How Smart Thermostats Work Unlike traditional and programmable thermostats, many smart thermostats learn and adapt based on temperature, humidity and your family’s behavior, including when you and your family are likely to be home, awake and asleep. Your smartphone acts as a remote control for your heating, ventilation and air conditioning systems, allowing you to change the temperature from wherever you have a signal. Another benefit includes automated notifications if the temperature in your home rises or falls above or below a set threshold. For homeowners who travel frequently or who own a second home, these devices offer the ability to remotely monitor their property. Key Considerations for Using Your Smart Thermostat During cold temperatures, with a more traditional thermostat, you turn down the temperature when you leave your home and dial it back up when you return. With a smart thermostat app controlled by your phone, you are able, and might be more motivated, to turn down your system to a low temperature to conserve energy from wherever you may be. But be wary as turning the thermostat down too low could result in frozen pipes, Travelers Risk Control professionals warn. Be sure to keep the temperature at 55°F or higher to help keep the interior of the floor and wall cavities, where water piping can be located, above freezing temperatures. As part of the Internet of Things, smart thermostats are also subject to hacking and privacy concerns. You may think there is less of a safety concern than with smart locks or other security-related smart devices, as there is less incentive for hackers to target these devices. However, smart thermostats can provide details about your daily comings and goings, which a thief could find insightful. A prudent step would be for homeowners to make sure their devices are hard-wired to the Internet, rather than relying on a Wi-Fi connection. Choose a strong password and evaluate any specific safety concerns before you decide to buy a smart thermostat. As with any smart device, make sure it is compatible with your other devices or hub because not all devices communicate well with each other. The packaging for these smart devices may not offer detailed installation instructions, so you may want to consult a professional to help install them properly.  With spring on the way, it’s time to think about protecting and maintaining your most valuable investment: your home. It’s a good idea to give your house a thorough cleaning and inspection inside and out, both to refresh your space and to spot any potential problems. Ready to get started? Be sure to add these five basic maintenance tasks to your spring checklist. Examine Your Roof Winter weather can take its toll on your roof. First, check for loose or damaged shingles, animal nests, loose metal strips, cracked caulking, signs of fungus or algae, and damage to the chimney exterior. Address smaller issues now before they turn into big problems later, and be sure to hire a professional if you’re not comfortable with ladders and heights. Clear Out the Gutters Again, this could be a DIY project depending on your skill level, or you could hire a professional cleaning service. Remove all debris from your gutters, then check for leaks. Finish by power-washing to clear out any remaining dirt. Check for Cracks in the Foundation Unfortunately, routine caulking isn’t always enough to prevent masonry cracks in your foundation. Hire a specialist for epoxy injection that will chemically bond the cracks. Reseal Windows as Needed A leaky window is bad for your energy bills. If the weatherstripping has been compromised or the caulk is cracked, make any needed repairs. Get an HVAC Inspection Along with changing the filters regularly, have a professional come out for a tuneup every year. Spring is also a good time to check your homeowners insurance to make sure you have enough coverage. Reach out today if you have questions about your policy.  You’ve decided it's time to replace your outdoor deck and you’re ready to take it on as a DIY project, or you’ve decided to work with a licensed and bonded contractor for the heavy lifting. Before you start on such a critical project, it’s important to know that decking options have grown over the last several years, bringing new choices in composite plastic and wood products from which to construct your deck. While they often cost more than wood, composite materials offer the promise of greater durability and less maintenance. Wood is still the most common choice for deck material, but it doesn't last forever. Composites may be more durable, but they might lack the natural look and color you are looking for. In June 2016, CBS News reported that while wood products still have a command on the market, composites are growing in popularity. Synthetic wood commands about 16 percent of the $7 billion-per-year deck market and appear to be gaining some traction. From cost to maintenance and durability to look, there are many things to think about as you decide between composite or wood for your next deck. Here are some pros and cons to consider before you decide which product to buy. Calfee Insurance wants to help you protect the things that matter to you. We offer a wide breadth of products so you can be covered at home and on the road. Pros of Composite Decking
 Conventional wisdom has long held that kitchens and baths sell homes. Those are also two of the more expensive areas to tackle for home improvement, but if you make sound design decisions and choose the right materials, you could end up making your home more appealing to potential buyers – and a more enjoyable place for you to live. And, if you’re handy, some of these ideas may even be great DIY (do-it-yourself) home projects. A study from the National Association of Realtors1 confirms that kitchens and baths still top the list of interior home improvement projects that appeal most to potential buyers. The survey ranked the projects by the percentage of the remodel cost that would likely be recovered based on the home’s resale value after the remodel. These five home improvements can potentially provide the biggest bang for your buck when it comes to ROI. 1. Complete Kitchen Renovation National Association of the Remodeling Industry’s (NARI®) cost estimate for the project: $68,000 REALTORS® estimated cost recovered: $40,000 Percent of value recovered from the project: 59% The look and feel of a kitchen can serve as shorthand for how up to date the owners have kept a house. Potential buyers have been known to rule out homes based on kitchens alone. Stainless steel appliances and granite countertops continue to be on many buyers’ checklists, especially those who want to move right in and start entertaining. The top reason for renovating a kitchen, cited by 24% of homeowners, was to upgrade worn-out surfaces, finishes and materials. According to the Remodeling Impact Report, 10% of realtors said a completely renovated kitchen most recently helped them clinch a deal, resulting in a closed sale. 2. Kitchen Upgrade NARI’s cost estimate for the project: $38,300 REALTORS® estimated cost recovered: $20,000 Percent of value recovered from the project: 52% A less expensive alternative to completely gutting a kitchen is an upgrade to the current design. Replacing dated appliances, refinishing cabinets and changing out tile backsplashes are some cost-effective updates that can still modernize a kitchen and make it more appealing to buyers. While 12% of realtors suggest that sellers completely remodel their kitchens, 57% have suggested a kitchen upgrade. Twenty percent of realtors have said a kitchen upgrade most recently helped complete a deal. In addition to the resale value, kitchen improvements can also help you enjoy your time in your home, with better functionality and livability cited by 29% of respondents as the most important result of their remodel. Travelers wants to help you protect the things that matter to you. We offer a wide breadth of products so you can be covered at home and on the road. 3. Bathroom Renovation NARI’s cost estimate for the project: $35,000 REALTORS® estimated cost recovered: $20,000 Percent of value recovered from the project: 57% Bathrooms are another place where a home can show its age, and potential buyers may hesitate at the cost and work involved in remodeling an outdated bathroom after buying a home. Still, while 33% of realtors have suggested sellers complete a bathroom renovation before completing a sale, only 4% said the project most recently helped them complete a deal. 4. New Bathroom NARI’s cost estimate for the project: $60,000 REALTORS® estimated cost recovered: $30,000 Percent of value recovered from the project: 50% A remodeling decision often driven by function rather than a desire to modernize, adding a new bathroom is nearly as expensive as completely remodeling a kitchen, but with less of a “wow factor” for potential buyers. With only 5% of realtors suggesting that sellers add a bathroom and only 1% saying the project most recently helped clinch a deal for them, this may be one project that makes more sense for homeowners planning to be in their homes for several years. 5. New Master Suite/Owners’ Suite NARI’s cost estimate for the project: $150,000 REALTORS® estimated cost recovered: $75,000 Percent of value recovered from the project: 50% The costliest project on the list, a new master suite or owner’s suite, is another project that may have greater value to you while living in the home rather than in making it attractive to future buyers. Sixty-five percent of respondents said they have a greater desire to be home since completing the project. Only 3% of realtors have suggested that sellers complete an owner’s suite before attempting to sell, and less than 1% said the project most recently helped clinch a deal for them. Still deciding where to focus your budget for home improvement? Make a list of the reasons you’re considering each project, and be sure to consider the impact on your home insurance, too. Want to attract future buyers and increase the value of your home? Kitchens and bathrooms remain a good place to start. If you plan to remain in your home for a number of years, you may want to update a bedroom, add a bathroom, convert a basement to a living area or tackle any other project that will add to your own appreciation of where you live.  Owning a home can mean dealing with the unexpected – from a tree falling on your roof to a pipe bursting in your bathroom. Because you likely can’t prevent all unwanted surprises, knowing what to expect if you have a homeowner’s claim can help give you some peace of mind.
While insurance carriers can handle claims in different ways, here are some basic steps in the process. If Your Home Has Been Damaged:
Beginning the Claim Process:
We are an insurance company that cares. We help you get the coverage that meets your needs to help protect the things that are important to you, so you don’t have to worry. Relocating After a Loss:
Resolving a Claim:
 While renters insurance offers broad protection for tenants, it's important for consumers to choose the policy that best suits their individual needs.
A renters policy can cover your personal belongings and help cover legal costs in the event you are sued for accidental bodily injury or property damage of others. But not all policies are the same. Here are five questions to ask your insurance representative to help you make the right choice. 1. What's Covered and What's Not? A renters policy generally covers your stuff against events like theft, lightning, fire, smoke, vandalism, explosions and windstorms.1 There's also liability protection against claims and lawsuits alleging that you caused bodily injuries or property damage. There may be coverage for certain kinds of water damage, such as leaks from damaged pipes. Your insurance rep can tell you if the policy includes additional living expenses if you're forced to move due to a covered loss. A typical renters insurance policy does not generally provide coverage for damage from floods and earthquakes. Also, there will be limits on how much coverage is provided for your things. There could also be lower limits in the policy for different categories of your possessions. If you own expensive collectibles, such as jewelry or art, ask your insurance representative about buying additional coverage for these valuables. 2. Will a Renters Policy Cover my Roommate? Renters insurance typically covers family members, but may not cover roommates. Calfee Insurance recommends that each occupant obtains his/her own policy to cover their individual stuff. Some insurers allow roommates to be insured under a single policy. In these instances, roommates must agree to the level of coverage, based on the combined value of their stuff. If one roommate moves away, the remaining renter typically will need to obtain a new policy. 3. What's the Difference Between Cash Value and Replacement Coverage? There are two types of renters coverage, one that pays based on your property’s actual cash value and one that pays based on you property’s replacement cost. For example, a computer you bought for $1,000 eight years ago has significantly depreciated in value, let’s say to $200. If you have a cash value policy, the maximum amount you would be paid would be the lesser of the cost to repair it, or $200. If you have a replacement cost policy, the amount you would be paid would be the lesser of the cost to repair or replace the item with a similar new computer. 4. Will Owning a Dog Affect my Renters Coverage? Some policies provide coverage if your dog injures someone, and some insurers exclude or limit coverage for customers who own a dog. It’s best to discuss this with your insurance representative when purchasing your policy. 5. Am I Covered if my Laptop Computer is Stolen from my Car Parked Outside my Home? Renters policies generally include coverage for items stolen off-premises. That means belongings outside your home have insurance protection similar to the things inside your home. However, off premises coverage may be limited to a percentage of your total coverage for personal items. For example, if you have $50,000 in personal items coverage, the amount available for off-premises losses may be 10 percent of that figure, or $5,000. Also, keep in mind, there is generally a deductible that applies.  Frozen pipes can present an invisible threat – one that you might not recognize until the weather starts to warm. By then, the water damage can be significant and costly. Fortunately, keeping your home warmer, at a consistent temperature, and better insulated can help protect your pipes from freezing this winter.
What Do You Do if You Have a Frozen Pipe? If you suspect pipes in your home have been exposed to freezing temperatures, or water is not flowing through a faucet normally, follow these steps to help reduce the potential for water damage:
Why is a Frozen Pipe a Concern? When water begins to freeze, it expands. This can cause both plastic and metal pipes to burst, possibly leading to significant water damage to your home.
Which Pipes Are Most at Risk? Pipes that are most exposed to the elements, including those outdoors and along the exterior walls of your home, may need extra protection during winter months. These include the following:
How to Help Prevent Frozen Pipes Before winter:
During winter:
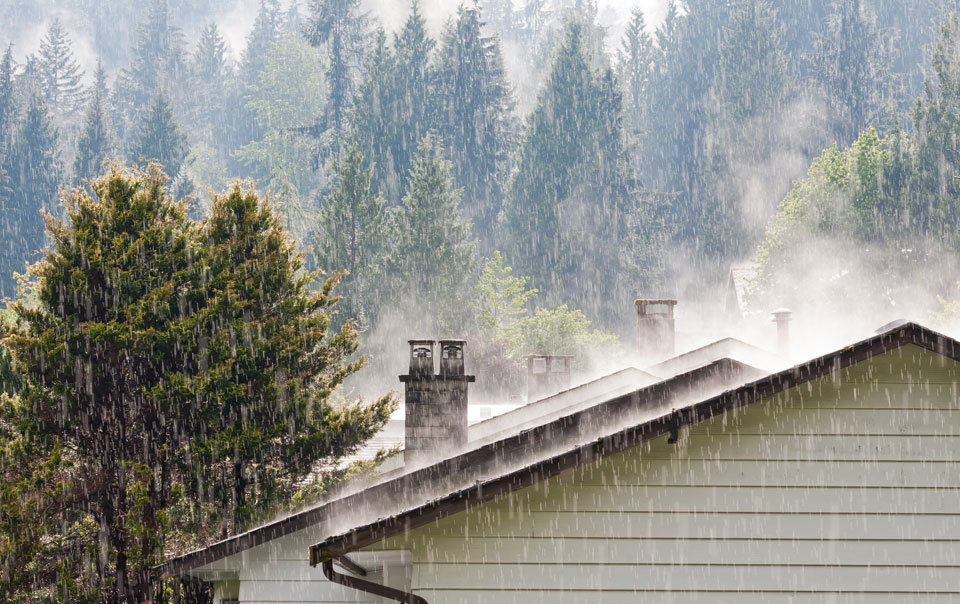 A heavy rainstorm has finally stopped. Or maybe a long winter has finally ended, and the deep snows have begun to melt.
While good weather may seem like a relief, the potential for water damage may just be beginning. Storm water runoff can quickly overwhelm natural and manmade systems, leading to flooding and property damage. The steps you take today to prepare your home and yard for proper drainage can help avoid time-consuming and costly repairs when the bad weather does blow through. In a natural environment, storm water runoff is absorbed by soil, evaporates into the atmosphere or flows into bodies of water, such as streams, lakes or rivers. Homeowners may need to recreate the natural environment on their property to address storm water runoff. This includes planting trees and other vegetation, building rain gardens and installing rain barrels or cisterns to collect roof water. How Can You Protect Your Home from Storm Water? The key to developing a yard drainage plan is to understand the specific characteristics of your property and implement the system that works best for you. During a storm, you can go outside and observe how the water flows. Take note of the different grades and slopes and whether they divert the flowing water away from your home. Look for any low spots that collect or pool water and for any steep slopes that have indications of surface erosion. Consider the steps needed to protect your property from water runoff. Rain that falls on roofs, driveways, patios, roads and other impervious areas moves across the ground surface at greater speeds. The property adjacent to these areas could be more susceptible to damage. Frozen soil can also increase risk of damage by preventing water from being absorbed by the soil. Replacing impervious areas with pervious surfaces, such as permeable paving stones or pavers, can also help. Other questions you might consider: Is storm water that falls on impervious surfaces diverted away from your house? This is the work of things like roof gutter downspouts, driveways, walkways and patios. Runoff from these surfaces should be directed to an area that has the ability to absorb or slow the surface flow, such as landscaped areas, and away from your house. Does your house have a stream, pond or lake close by? Consider the flood potential and how it may impact your property. You can research local flood maps that will detail flood water levels for various storm events and their flood potential. Does your driveway or other impervious surface have a negative pitch back toward the house? Consider installing trench drains or area drains to help prevent pooling and divert water away from the house. Do you have retaining walls on your property? If so, it is important that the walls have a drainage system in place to alleviate pressure behind the wall. Periodically clean weep holes to ensure they are not clogged. Surface water should not be allowed to cascade over the top of the wall and instead should be diverted to the end of the wall or around it. Is a portion of your house below ground level, such as a basement? Make sure any sewer and water lines, or any other pipes or lines that penetrate subsurface walls, and foundation cracks are properly sealed. Basements that are prone to water intrusion should have a water collection system in place, such as a sump pump system. This system should be maintained with a battery backup for continued operation in the event of a power failure. Consider elevating mechanical systems or installing curbs around areas that need protecting but cannot be elevated, such as finished areas and storage areas. Exterior basement window wells should have covers and the ground surface of the well should be below the well rim. Do you have a sewer or septic system and property with known high water tables? Have the system checked by a professional. If the groundwater rises too high, it can affect the efficiency and operation of the system. In some cases, this may lead to sewer back up or waste leaching above the ground or back into the house. Surface storm water is not the only consideration for protecting your home. It is also important to assess the functionality of your whole home envelope system. Make sure that your house exterior is maintained, including roofing, flashings, weather barriers, windows, doors and sealants. While you cannot prevent against all damage from storm water runoff during large acts of nature, these steps can help protect your home when storms do hit. 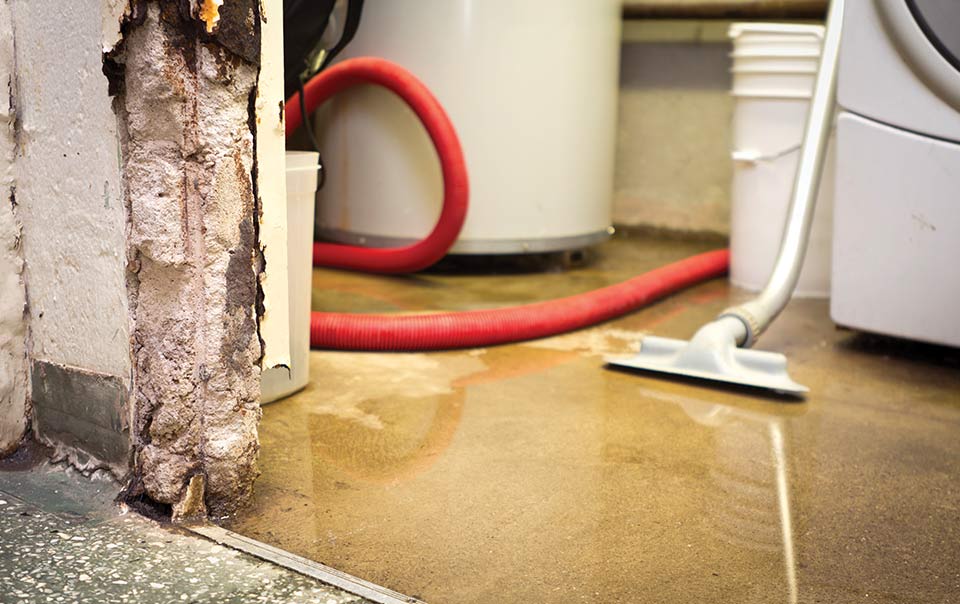 A sump pump is an important component of your home's equipment that helps protect your property by controlling water and keeping your home dry. Typically found in basements, sump pumps are usually professionally installed in a specially constructed sump pit. When the water table around your home is high, your sump pump can help keep your basement dry and might even help minimize damage to your home if you experience a plumbing or appliance leak. As a homeowner, you'll want to maintain your sump pump to make sure it's working properly.
The sump pump's job is to pump water outside and away from the home. To help keep it functioning properly, your sump pump needs regular maintenance. Here are some tips to help make sure your sump pump stays in good working condition. How to Help Keep Your Sump Pump in Good Condition
Learn more about the maintenance for your sump pump by referring to the owner's manual. Check on your sump pump and pit regularly, especially if a significant amount of rainfall is forecast. Keep the sump pit clean and free of debris. Don't forget to check and clean the inlet opening or screen. Unplug the pump when you are cleaning it, but don't forget to plug it back in when you are done. If water backs up from a sewer or drain within your home or if water discharges or overflows from your sump pump, water backup and sump pump discharge or overflow coverage can help cover the loss up to a specified dollar amount. This does not include coverage for flood or surface water backup. Talk to your local independent agent representative about whether this coverage is right for you. |


better Insurance
|


 RSS Feed


Arthur D. Calfee Insurance Agency, Inc. is a friendly local insurance agency proudly offering Massachusetts, Cape Cod and the Islands. A-Excellent AM Best rating, A+ Excellent by the BBB
Using innovative thinking, cutting-edge tools and expert resources at national and local levels, we deliver the best possible outcome on every policy we manage. Need Home Insurance? Easy, Fast, & Secure Home Insurance. Get Free Quotes 100% Online Now! Available 24/7. Affordable Rates. Cover Your Biggest Investments. Get a homeowners insurance quote, find coverage options. We'll help you understand and customize the right home insurance coverage for you.
Home is where your heart is—along with a healthy chunk of your net worth. Get started today with a free homeowner's quote.
Compare home insurance quotes today and save on protection for your biggest investment. Build a Custom Policy & Make the Switch! Our local underwriting professionals focus exclusively on finding the best home insurance, homeowner's insurance, hazard insurance, investment property insurance, flood insurance, flood zone information, vacation home insurance, second home insurance, auto insurance, collector car insurance, business insurance, general liability insurance, property insurance, professional liability insurance, contractor's liability insurance, worker's comp insurance, key man insurance, whole life insurance, term life insurance, group or personal disability, & long-term care insurance policies to patrons in the following Cape Cod, Massachusetts towns, communities and villages: Barnstable, Bourne, Pocasset, Brewster, Buzzards Bay, Centerville, Chatham, Cotuit, Craigville, Dennis, East Dennis, Eastham, Falmouth, East Falmouth, Hatchville, West Falmouth, North Falmouth, Woods Hole, Harwich, Hyannis, Hyannisport, Martha's Vineyard, Nantucket, Marstons Mills, Mashpee, Orleans, Osterville, Provincetown, Sandwich, Sagamore, Sagamore Beach, Truro, Wellfleet, Yarmouth, and Yarmouthport. Real-Time Pricing. Insurance coverage: Wind Damage, Fire Loss, Water Damage. Protect your home and belongings. Low Rates For Your Best Options to Save Money On Great Coverage! Get a quote today. Home insurance helps protect your house and your family.
Testimonials & Endorsements for the Best Insurance Agent on Cape Cod, MA
PHONE: (800) 479-2601 CUSTOMER SUPPORT & SERVICE
Please note: The above is meant as general information to help you understand the different aspects of insurance. This information is not an insurance policy, does not refer to any specific insurance policy, and does not modify any provisions, limitations, or exclusions expressly stated in any insurance policy. Descriptions of all coverages and other features on this page are necessarily brief; in order to fully understand the coverages and other features of a specific insurance policy, we encourage you to read the applicable policy and/or speak to an insurance representative. Coverages and other features vary between insurers, vary by state, and are not available in all states. Whether an accident or other loss is covered is subject to the terms and conditions of the actual insurance policy or policies involved in the claim. References to average or typical premiums, amounts of losses, deductibles, costs of coverages/repair, etc., are illustrative and may not apply to your situation. We are not responsible for the content of any third-party sites linked from this page.
© 2023 Copyright, Arthur D. Calfee Insurance Agency, Inc.
Calfee Cares.® Privacy Policy
Calfee Cares.® Privacy Policy